
'Organizing Forward' Part 3: Getting down with your printed photos
Our theme this month,'Organizing Forward', is all about taking first steps. With your printed photos, one first step that you can take is to get them preserved. The best way to preserve them...scan them.
Back in October, I blogged about why a person would want to scan some of their old photos (See Scan, Baby, Scan, Oct. 12, 2015), so check that out. Today, I want to make it so easy that you can't resist getting down to business with that box in your closet.

First Step...Sort them ABCs style in the following piles (fyi-I love bringing order to big mess of photos, so call me if you need help with this step!):
A - Photos that are the most important to you - personal and cherished. They are 'album' worthy. You will want to scan these.
B - Photos that are important enough to keep and preserve in a real or digital photo 'box'. You will likely want to scan at least some of these, especially if you plan to share them.
C - Photos that belong in the trash 'can'. They are duplicates, blurry or have excess scenery that to be honest, you have no idea where they were taken.
S - We separate these pics because they tell your 'story' (family, event, other history). These should definitely be scanned.
Once sorted, figure out how you want to get them scanned. Your options are doing it yourself or hiring a professional. Here are some of the pros/cons of each:
DIY
a printer/scanner at home - inexpensive option if you already own decent equipment. If your time is precious, this might not be the best choice. Printer/scanners are typically quite slow. Quality can be good or less good depending on the equipment. In addition to the actual time spent scanning, you often need to crop and edit scans from a printer/scanner, which takes additional time.
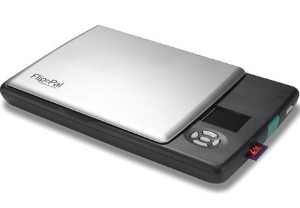
a personal scanner like the FlipPal - This is faster than a printer/scanner, but again, takes some time. The cool thing about the FlipPal is that it is mobile so you can take it to the family reunion. Quality is good. Downside is you can't scan larger prints without using their stitching software, which again, takes time.
find a big box store that has a scanner. Time is a factor in this option, as well, but would likely be cost effective. Editing may still be required. Depending on how many pictures you have, hanging out for hours in Walmart or Target may or may not be a first choice.
Hire a Professional...
select a local professional to scan your memories - full disclosure...I'm a bit biased on this option... Here are the pros to hiring someone like CYP...We're local - no sending your memories into the unknown. We do premium scanning, which means that we give attention to each and every image - we don't just run it through the machine. We also give white glove service to all heritage photos and scan all images at 600 dpi, which provides a higher quality image. To be fair, our scanning services may be slightly more per scan than some of the other solutions (unless you purchase equipment) because of the attention to detail. Our clients typically enjoy the quality, the full service aspect of the work and value the time they save.
a non-local scanning company where you send your photos away and they send them back. This can be cost effective, however, don't forget to count shipping as part of your costs. Downside is that if you are unfamiliar with the company, you don't know how diligent they will be about taking care of your memories and you don't know exactly where you are sending them. DON'T choose this option based on the Groupon you just found. Do your research.

No matter the option you choose, whether you are working with your digital pics or your printed pics, getting started is the hardest part. Schedule time into your day if you need to, but most importantly, remember why you are doing it. You and your photos have the power to build relationships, increase self-esteem in your children and bring people together. Memories matter.
I'm here for ya!
Holly