
How to create a gallery wall
Not too long ago, we gave our family room a makeover…fresh paint, a few new pieces of furniture, and best of all, a big blank wall for me to create a brand spankin’ new photo wall. A while back, I designed a 40-frame gallery wall for a client for their new home. It was amazing and ever since then, I’d been itching to create one in our home.
Here are the steps I took to be both efficient and to recycle some of the frames I already owned:
1. Measure the wall. Figure out how much space you have and how big you want your gallery wall to be. I figured out that I had room for 10-14 frames, depending on how big the actual frames were. I prefer to have 5x7 or bigger photos for a wall, but ultimately I did end up with a few 4x6s. I LOVE my 12x12s.
2. Source the frames, considering color and frame style. I knew I wanted to reuse some frames that I already owned, but I also knew that I wanted some larger ones and some with white mats that I would need to buy. I decided to go with all black, with a mix of frame styles. This is totally a preference thing. Some people like a mix of colors and styles, some people like same same. I’m somewhere in the middle. Because I wasn’t going with all of the same style of frame, I didn’t feel like I had to have it all planned out perfectly before I went shopping. I bought 6 frames in 3 different styles, knowing that I could either return any extras or use them somewhere else.
If not having a plan freaks you out, check out the Capture Your Photos Pinterest Wall Displays Board. You will find a ton of ideas, templates and the exact frame sizes to buy.
For the ’40-frame’ project, we sourced frames from Picturewall, which made it super easy to layout, as well as hang.
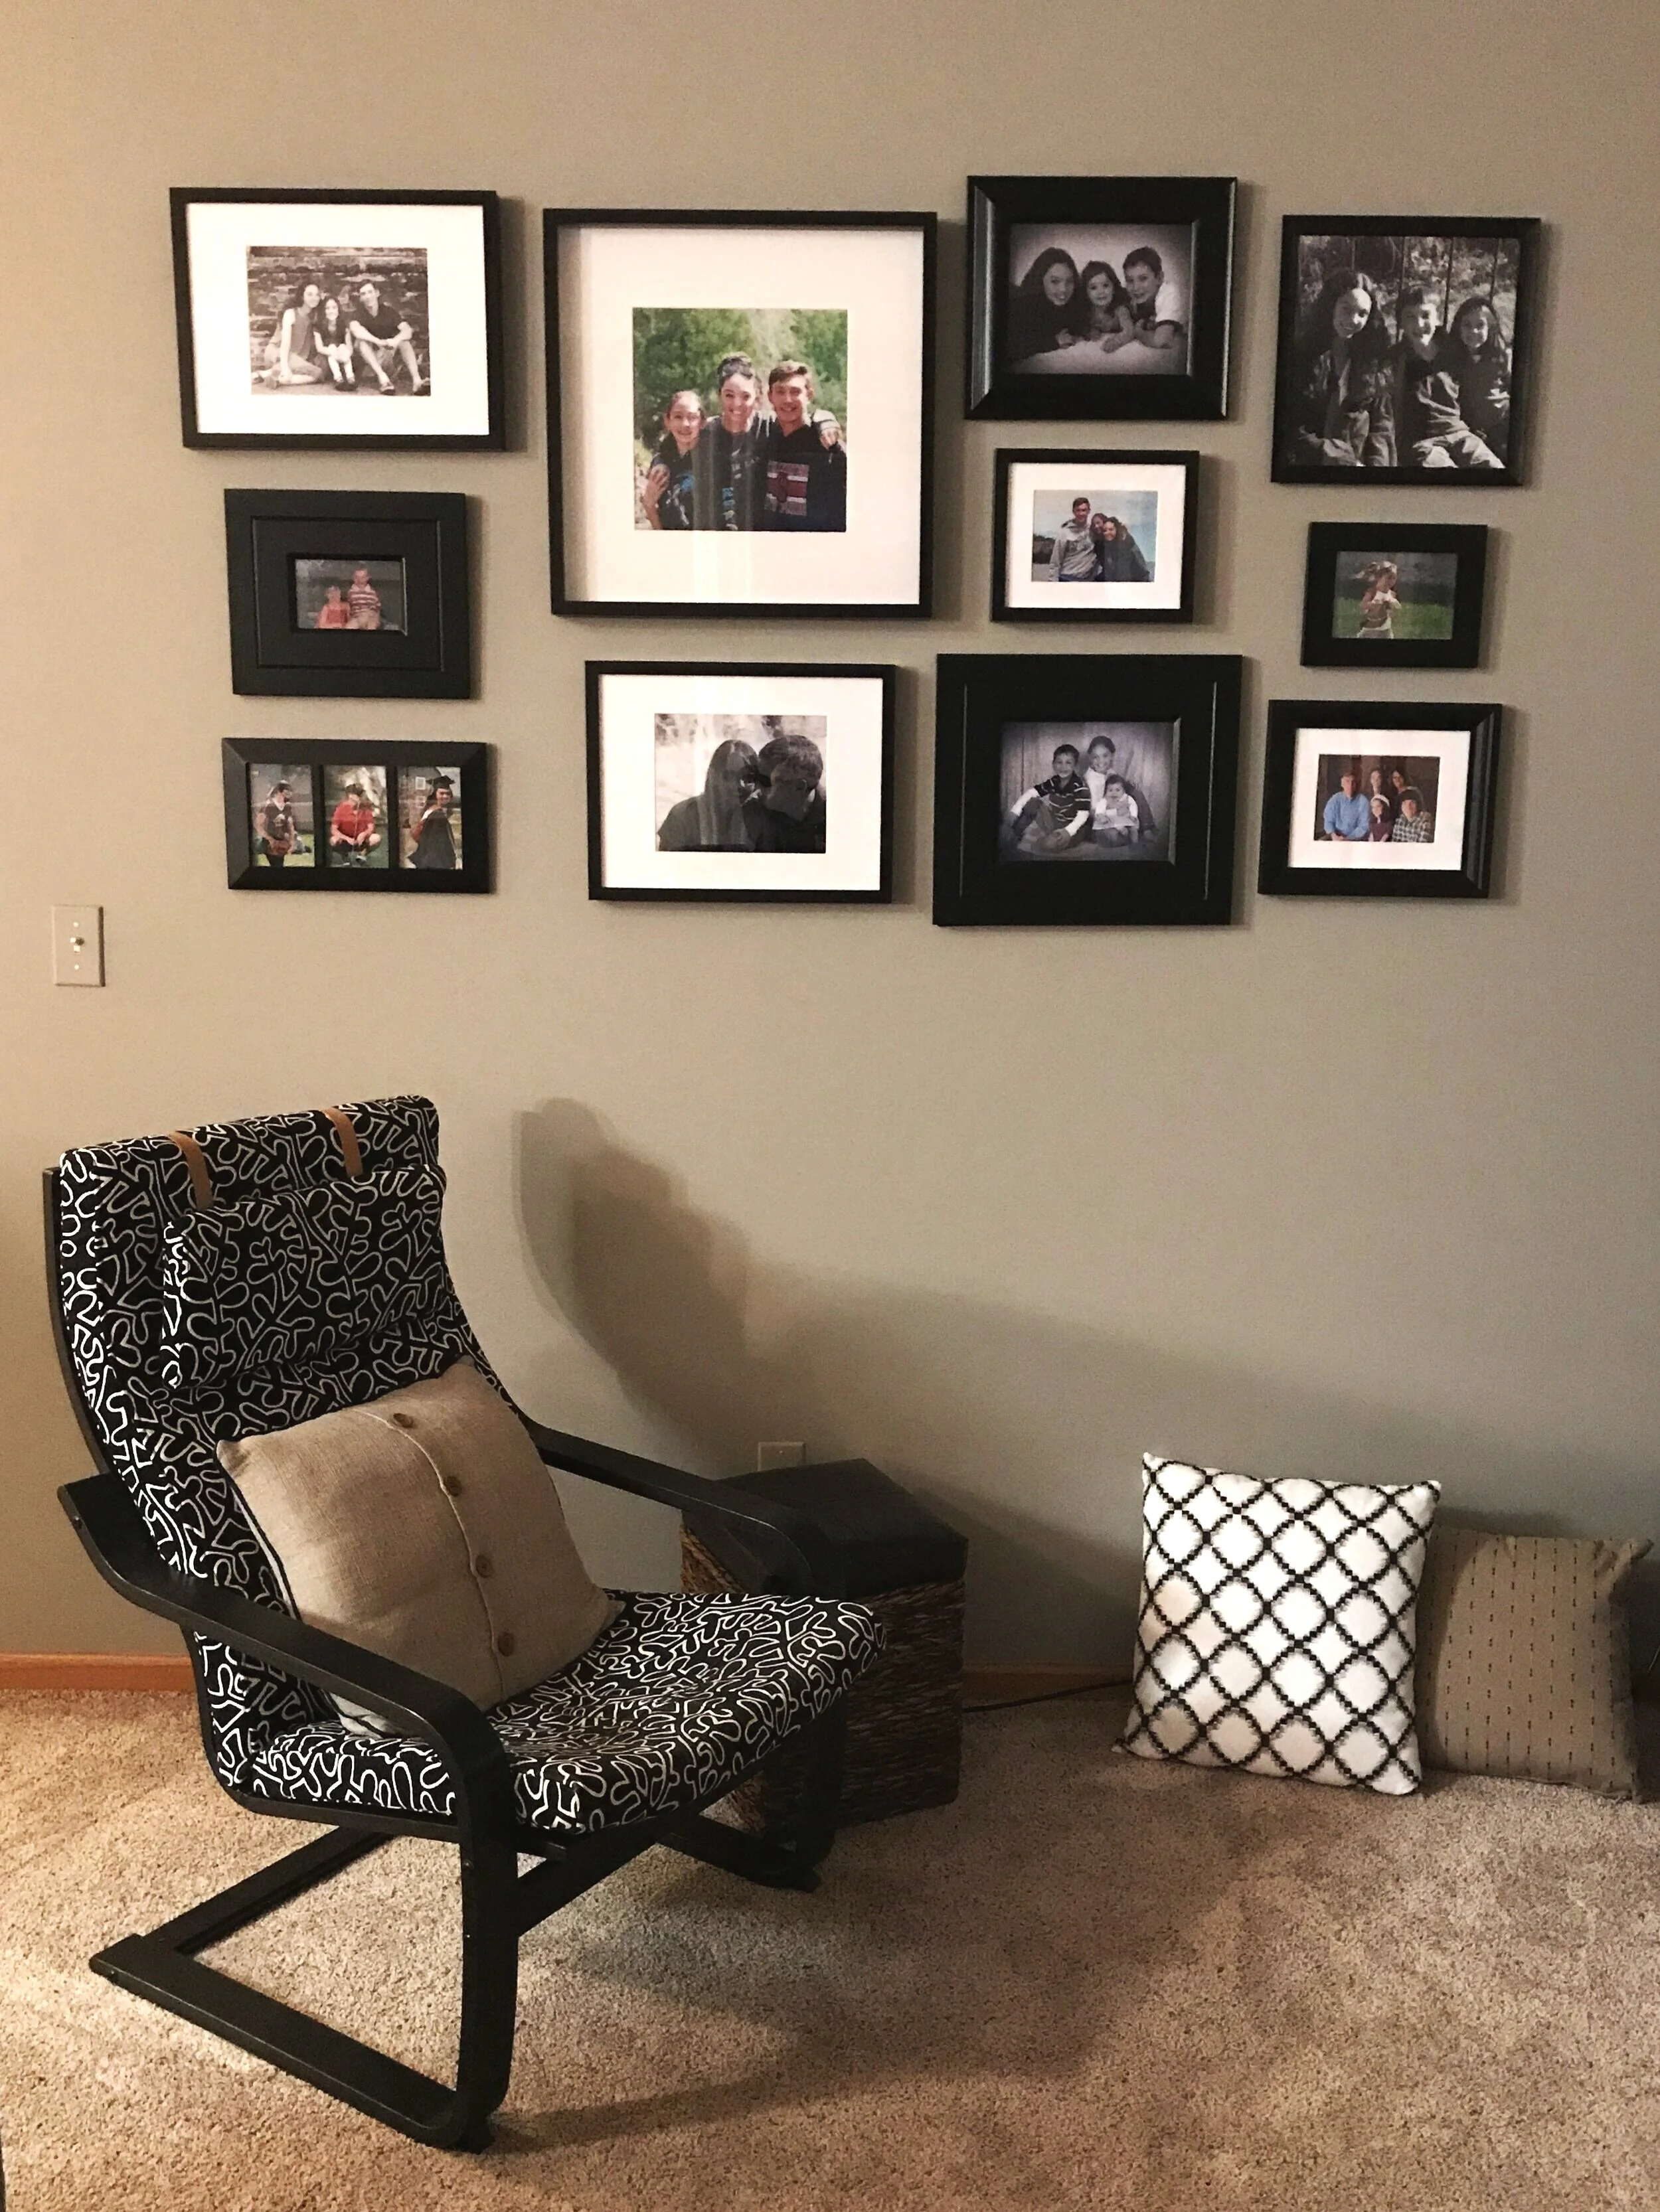
3. Layout the frames. Using the measurements of the wall, I laid the frames out on the floor in different formations until I landed on a design I liked and one that would work with my mix of frames. One trick is to start by choosing the frame(s) that you want as the focus on the wall and work out from there. For me, that was the large 12x12 frame. Also, since only some of my frames had the white mat, I needed to make sure those frames were spread out. I typically plan to space frames approx. 2 inches apart.

Because I wanted to visualize how it would look on the wall, I cut out pieces of paper the size of each frame and taped them to the wall. This also helped us to hang them perfectly.

4. Select your pictures. Has anyone noticed that I haven’t even talked about the actual pictures yet? Truth is, I didn’t pick out the pictures until I had the frames figured out. The reason is because I knew that this gallery wall was going to mostly be pictures of my kids, and I knew I would have no trouble finding pictures that I love. It was easier to fit the pictures to the frames, than it would have been to fit the frames to the pictures.
Choosing photos for a project like this is often the place that my clients get overwhelmed, especially when they have a lot to choose from. Just remember, prints are fairly inexpensive and replacing a picture takes about 5 minutes, so if you decide you don’t like one, it’s an easy fix.
Once I selected the pics in the right sizes for each frame, I ordered them online and a few days later they were delivered to my door.
5. Hang the frames. We decided to go ahead and hang the frames before we even had the pictures in hand. Full disclosure, this was a process my husband was absolutely dreading because he knows I’m kind of a perfectionist, but hanging the paper on the wall first gave him some confidence. Not gonna lie, hanging different types of frames is a little tricky and we may have put a few extra holes in the wall, but in the end, it wasn’t that bad…and the result makes my heart smile.

You can’t really do this wrong. I have a client who literally has photos in frames covering the walls of an entire room. They are a complete mix of styles, frames and colors and they are glorious. You can feel the love she has for her family when you walk into that room. It’s amazing.
This is one of those projects that you could plan forever and not get done. Just go for it. At the end of the day, perfection is overrated. I get so much joy out of my photo wall and I hope that you will too.
Overwhelmed with your photo mess? Getting started organizing your photos can be the hardest part! Grab our FREE GETTING STARTED GUIDE that includes tips for how to create a plan, teaches you how to take inventory of your collection, and provides the form to do it.

Holly Corbid is the founder and owner of Capture Your Photos, where we help you to celebrate life, tell stories and touch hearts with your photos. Need help organizing your digital photos, scanning your old family photos or creating a beautiful photo wall? Let’s talk!